
System programming · Guide
Running a stocktake in PowerEPOS Stock
Start, count and finalise a full or ad-hoc stocktake in the PowerEPOS System Manager, including counting in other sizes and checking variances before stock levels are updated.
PowerEPOS + Stock
Running a stocktake in PowerEPOS Stock
Stocktakes in PowerEPOS Stock V2
Stocktakes are run in the PowerEPOS System Manager. You can start one ahead of time, or date it back to when the count was actually done, so stock levels and variances are accurate.
In this guide
- StartBefore you start
- 1Open Stocktakes
- 2Start a new stocktake
- 3Choose which ingredients were counted
- 4Choose when the stock was counted
- 5Choose the stock categories, then start
- 6Enter your counts
- 7Count in a different size, if needed
- 8Check the Valuation, Summary Report and Discrepancy Report
- 9Finalise the stocktake
- 10Save or email the reports
- 11Need help?
Start
Before you start
- Access to the Stock Management console in the PowerEPOS System Manager.
- Your counts, either written on a count sheet or in a .CSV file with the PLU number and stock count for each item.
Step 1
Open Stocktakes
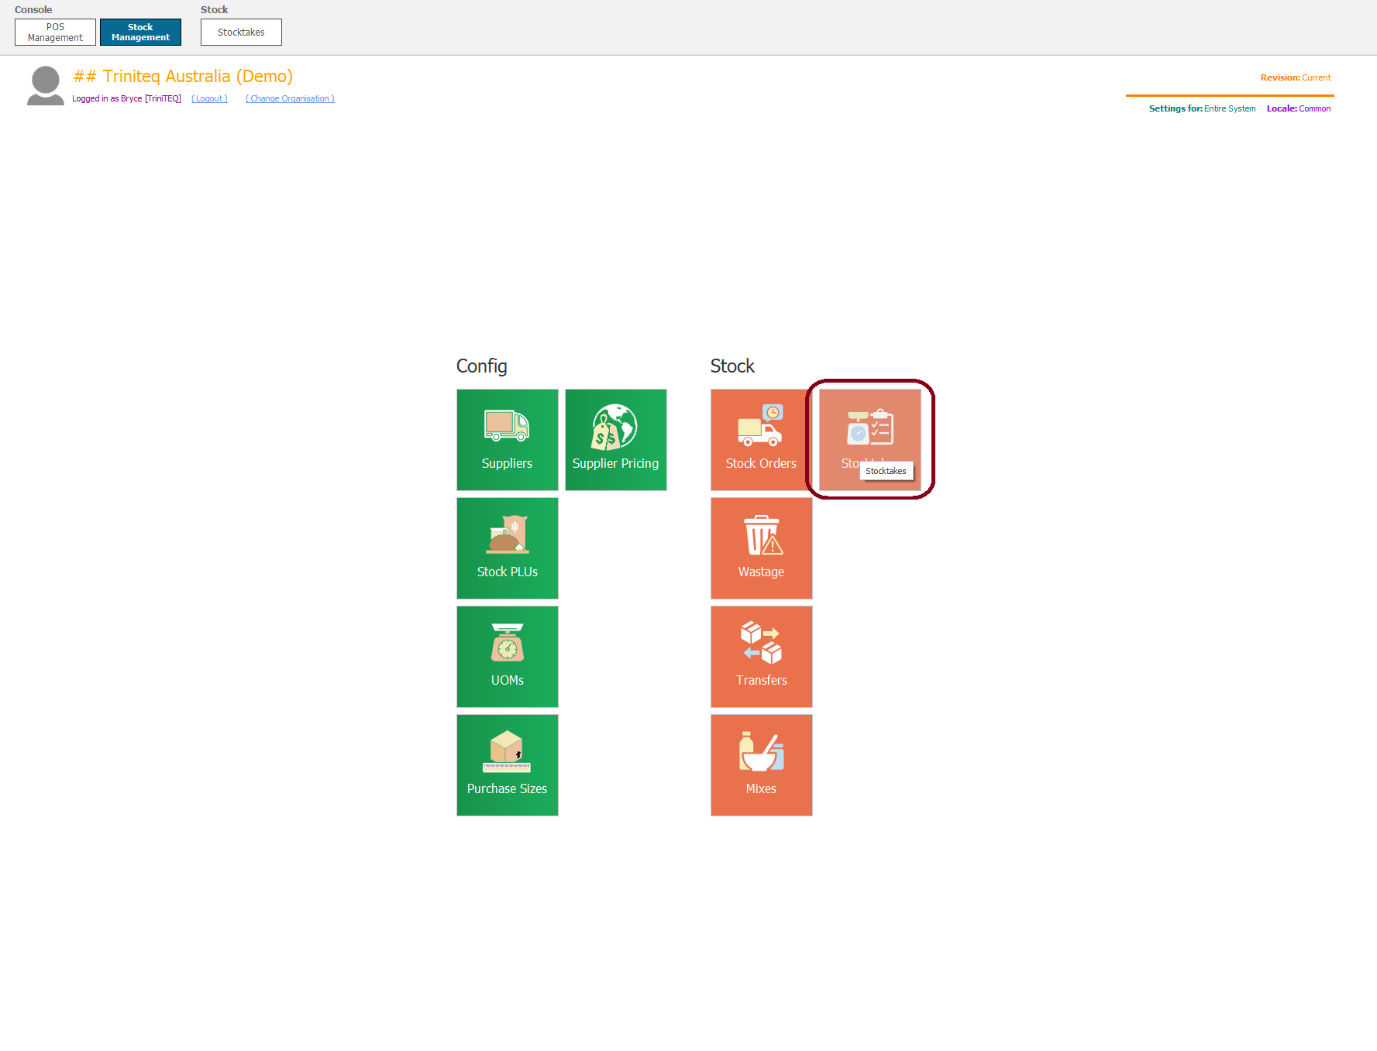
In the System Manager, click Stock Management, then click Stocktakes in the Stock section.
First stocktake at a venue
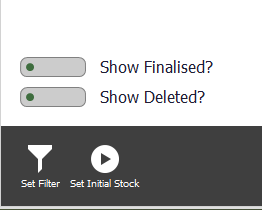
If this is your first count, you can click Set Initial Stock on the bottom bar of the Stocktakes screen. You can also do your first count as a normal stocktake: it works the same way, there is just no comparison data shown.
Step 2
Start a new stocktake
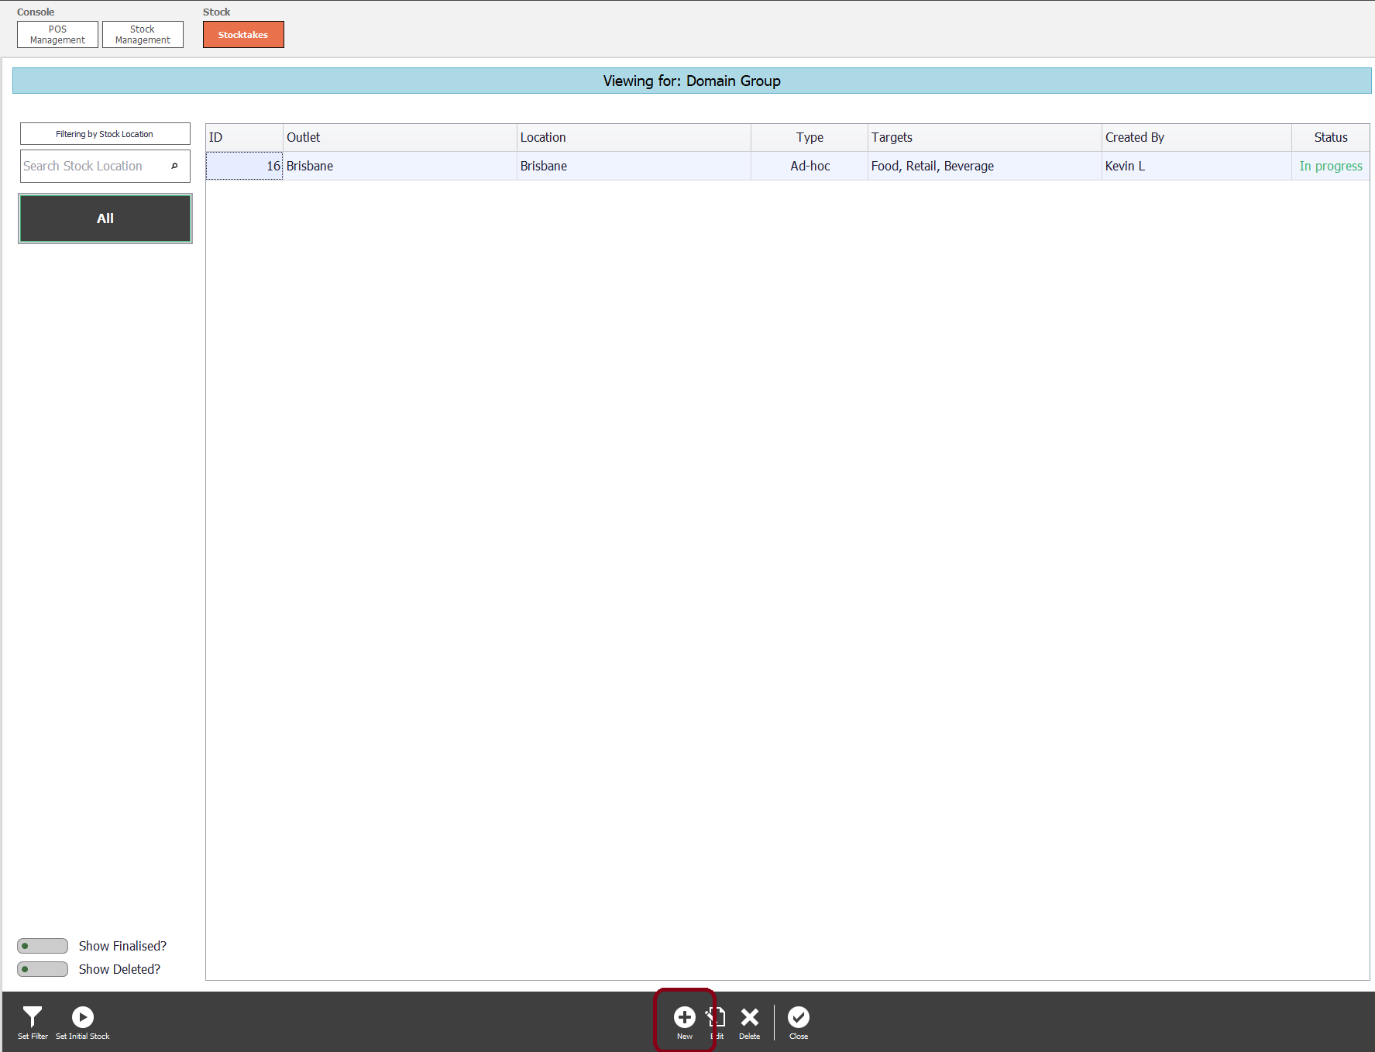
The Stocktakes screen lists every stocktake in progress. Turn on Show Finalised? or Show Deleted? to review earlier stocktakes.
- Click New on the bottom bar.
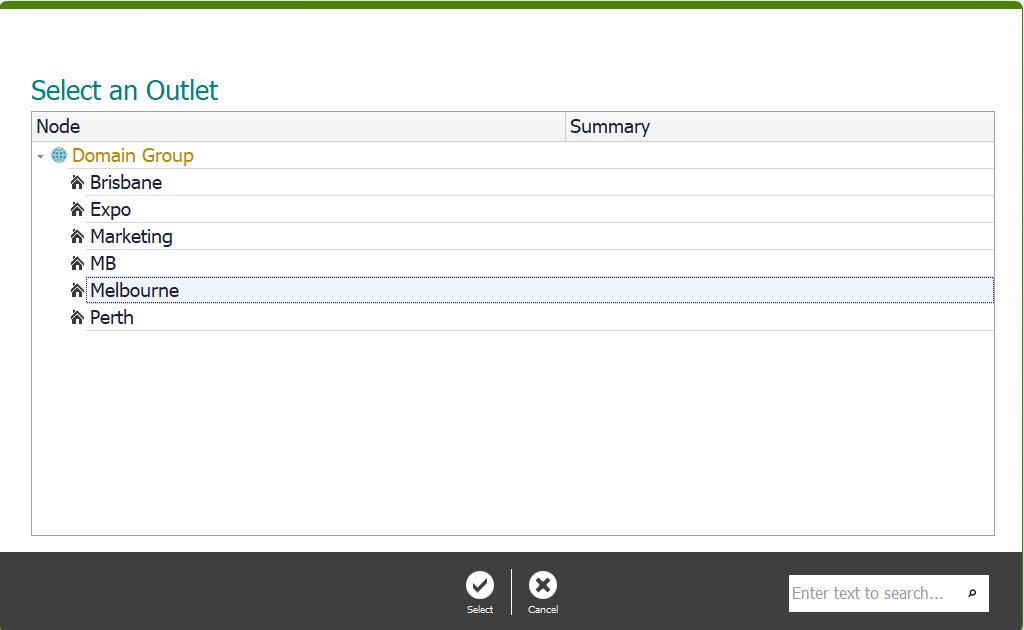
- If you have more than one outlet, select the outlet you are counting and click Select.
Step 3
Choose which ingredients were counted
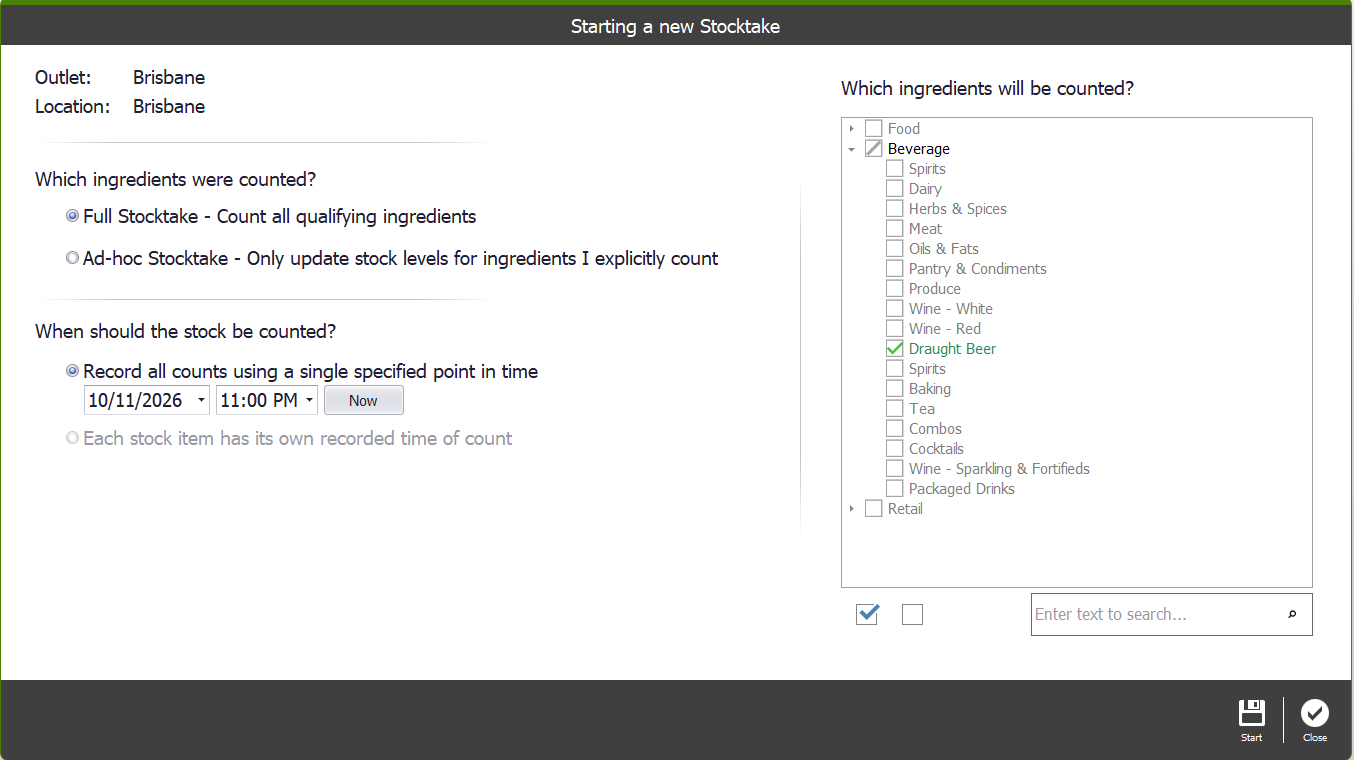
Under Which ingredients were counted? on the Starting a new Stocktake screen, choose one:
- Full Stocktake: counts every qualifying item. Use it for a full inventory count.
- Ad-hoc Stocktake: only changes the stock items you enter a count for. Use it when you only need to update a few items.
Uncounted items in a full stocktake become zero
When a Full Stocktake is finalised, any item with no count is treated as 0 and its stock level is set to 0. If you are only counting some items, use Ad-hoc Stocktake.
Step 4
Choose when the stock was counted
Under When should the stock be counted?, choose one:
- Record all counts using a single specified point in time: set the date and time, or click Now. The stocktake only uses stock and sales data from the last stocktake up to this date and time.
- Each stock item has its own recorded time of count: use this when items were counted at different times. You enter the date and time against each item on the sheet as you count it.
Step 5
Choose the stock categories, then start
Under Which ingredients will be counted?, tick the stock categories you are counting. The stocktake only uses data for, and only updates stock levels in, the categories you tick.
- Expand a category to tick only some of its groups, for example Draught Beer under Beverage.
- Use the search box to find a category by name.
- When all the settings are correct, click Start to generate the stocktake sheet.
The stocktake sheet fills in automatically with these columns:
- PLU and Description.
- Size: the stocktake size.
- Unit Cost: the cost of one stocktake size.
- Opening Stock.
- Received: through purchases.
- Sales: through the POS.
- Transfers: between stock locations.
- Wastage: through the POS and Stock.
- Mixed: manual mixes made in Stock.
- Additional Mixing: automatic mixes triggered by sales in the POS.
- Mix Consumption.
- Expected Stock.
- Count, Variance and Variance Cost.
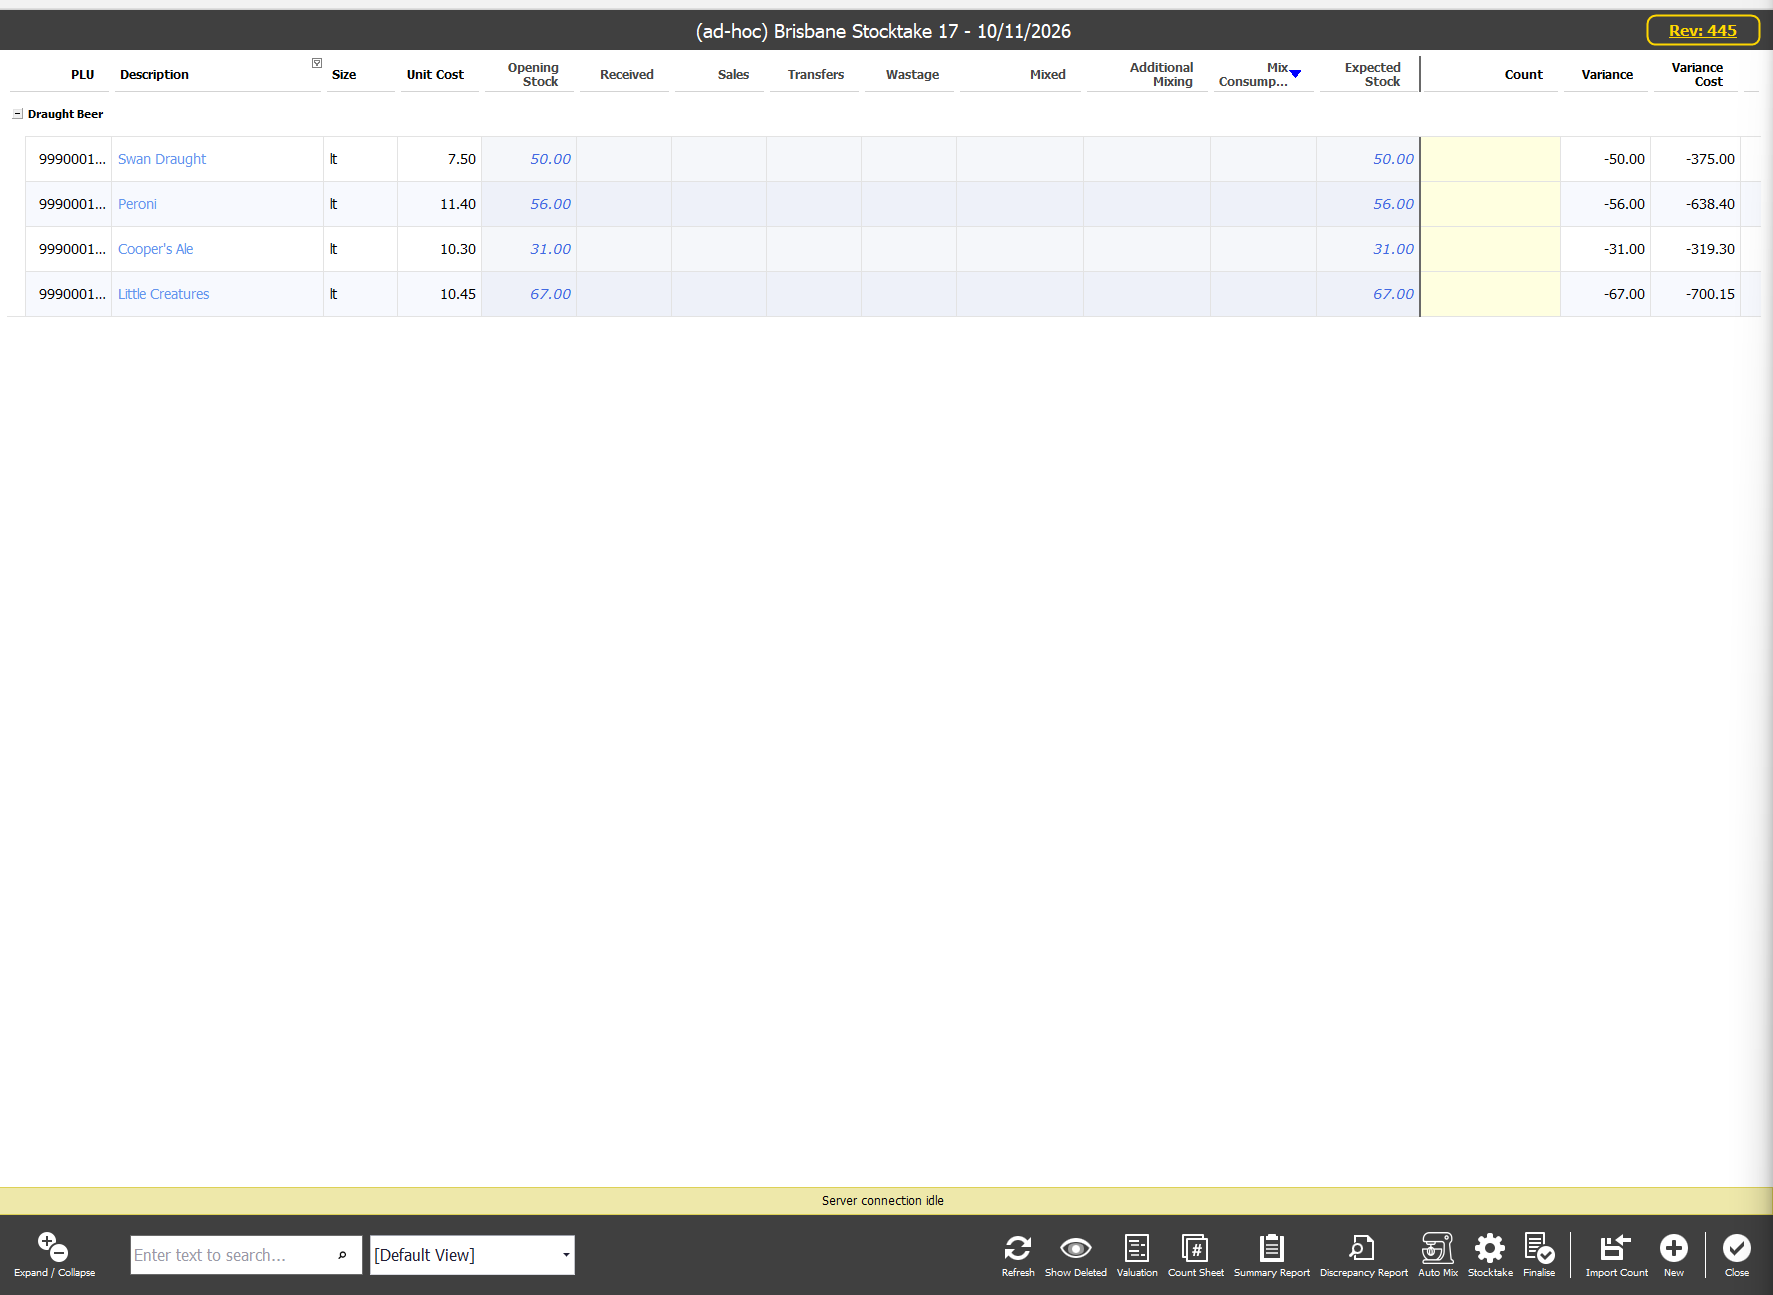
The bottom bar of the sheet has these tools:
- Refresh: picks up any changes made since the sheet was opened that affect this stocktake.
- Show Deleted: shows items that have been removed from the sheet.
- Valuation: shows the total cost of the items against their standard portion size.
- Count Sheet: a printable sheet to write the count for each item on.
- Summary Report: a quick summary of the sheet, with variances and their percentage against cost.
- Discrepancy Report: the items with a variance, for review.
- Auto Mix: creates a standard mix batch based on expected stock levels.
- Stocktake: reopens the setup screen to change the counted ingredients or the stocktake type.
- Finalise: finalises the stocktake.
- Import Count: imports counts from a .CSV file on your PC instead of typing them in.
- New: starts a new stocktake.
Step 6
Enter your counts
Enter your counts in one of two ways:
- Type each count into the Count column. Variance and Variance Cost update as you go.
- Click Import Count and choose a .CSV file with the PLU number and stock count for each item.

Step 7
Count in a different size, if needed
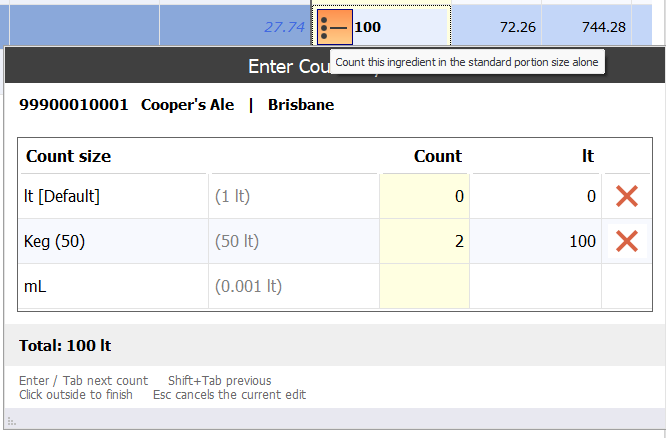
If you counted an item in a size other than its standard stocktake size (kegs instead of litres, for example), enter it in that size and the system converts it to the standard size for you.
- Hover over the item's Count cell and click the popup button that appears.
- In the Enter Count window, type the count against the size you counted in, for example Keg (50).
- Check the Total at the bottom, then click outside the window to finish.
- Back on the sheet, the count shows with an asterisk in front of it. The asterisk means the count was calculated from a size other than the standard stocktake size.
Step 8
Check the Valuation, Summary Report and Discrepancy Report
Use these reports to spot errors before you finalise. For each variance, either correct the cause or ignore it if the reason is known.
- If a variance is caused by a missing or incorrect mix or wastage entry, back-date the correct mix or wastage, then click Refresh on the sheet.
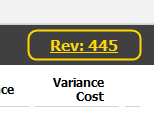
- If an item's stocktake size is wrong, fix the Stock PLU and publish it. Then click the yellow Rev button at the top right of the sheet and update to the latest revision. The size and cost correct themselves.
Step 9
Finalise the stocktake
Once you are happy with the stocktake, click Finalise, then click Yes on the prompt. Stock levels are updated to match the counts.

Review every variance first
Finalising adjusts stock levels to match the counts entered. Once finalised, the next stocktake takes its data from this stocktake's date onwards.
Step 10
Save or email the reports
After finalising, open the Valuation, Summary Report and Discrepancy Report and download or email them as PDFs for your records.
Step 11
Need help?
Triniteq support
Our support team is here to help.
Call 1300 784 276 or email support@triniteq.com, and include your venue name so we can find your setup straight away.